Spring Cloud Config를 통해서 설정 값을 중앙에서 관리할 수 있다.
보통은 기본값으로 git을 통한 관리가 이루어진다.
(https://joomn11.tistory.com/79)
설정값들 중에 password와 같은 중요 데이터들은 암호화가 필요할 수 도있다.
이러한 경우에 어떻게 해야하는지 알아보도록 하자.
Java Cryptography Extension (JCE) 설치
자바에서 제공하는 encrypt를 사용하기 위해서는 JCE 다운로드하여 classpath에 등록해주어야 한다.
( 11버전 이후 부터는 default로 포함되어 있다고 한다) (https://www.oracle.com/java/technologies/javase-jce-all-downloads.html)
application.yml 설정 추가
대칭키를 이용하기 위해서는 application.yml or bootstrap.yml에 해당 설정 추가
encrypt:
  key: test_key // set user key !
encrypt endpoint
위의 두 설정을 완료한다면 encrypt endpoint를 이용하여 원하는 property를 암호화 할 수 있다.
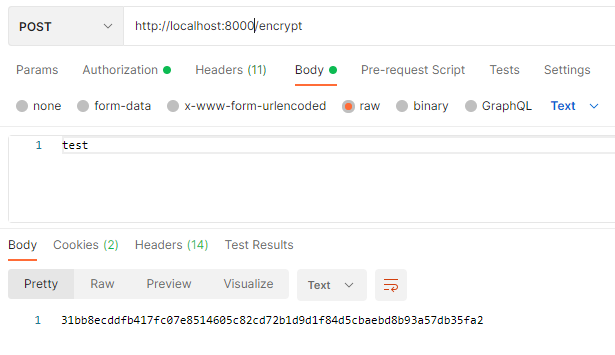
암호화 property 설정
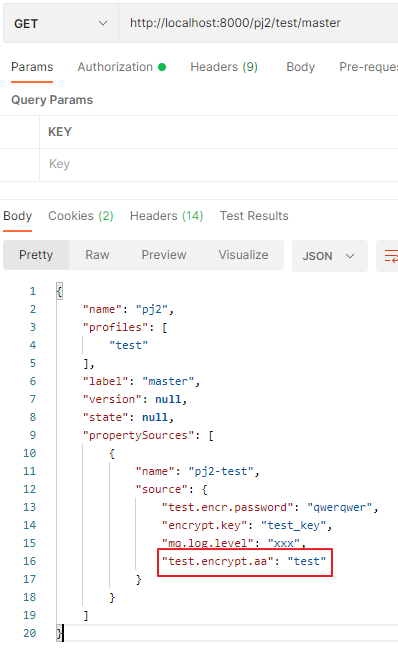
응답으로 온 값을 spring cloud config의 값으로 사용 할 수 있다.

실제 spring cloud config 서버에 로드된 값들을 조회해보면 아래와 같이 복호화된 형태로 조회가 된다.
추가적으로 암호화한 내용을 client로 전달할때 복호화를 하지 않고 건내고 싶은경우에 대해서 알아보자.
아래의 설정은 default값이 true이다.
해당 설정을 false로 바꾼다면 client에게 설정값을 전달할때 암호화 된 형태로 전달할 수 있다.
spring:
cloud:
config:
server:
encrypt:
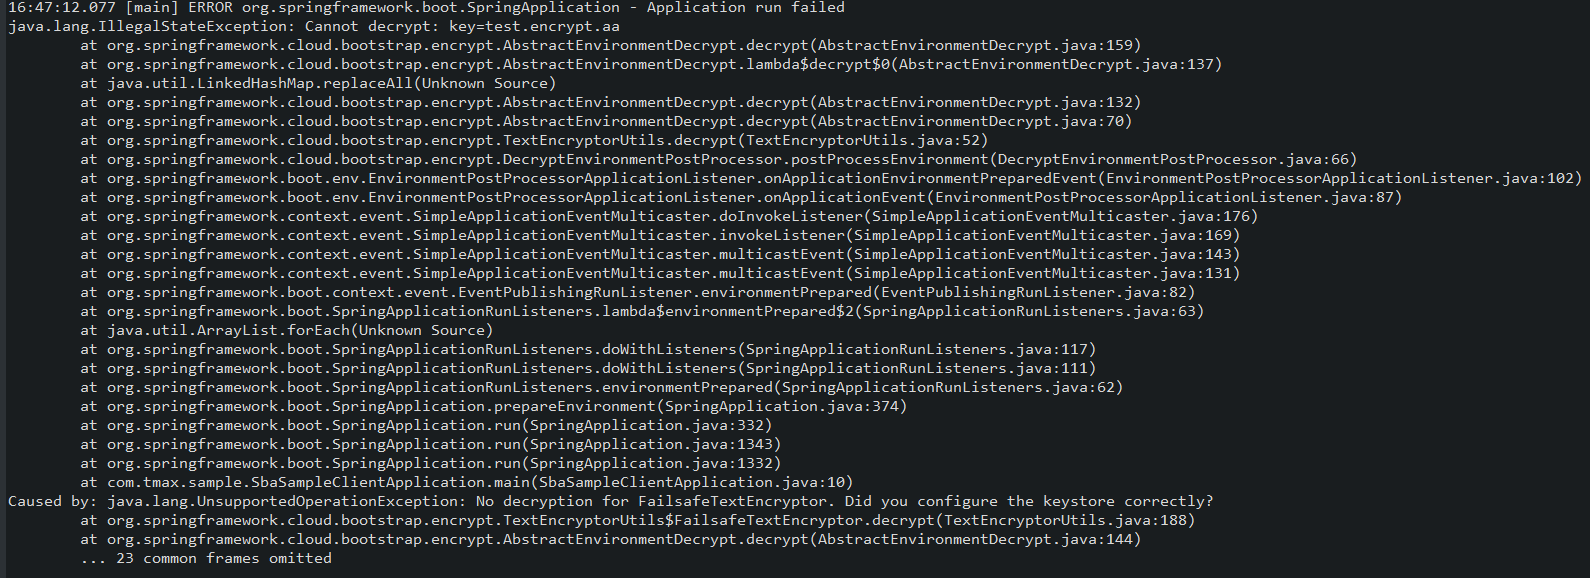
enabled: false하지만 저 형태로 설정을 한다면, client 측에서는 encrypt.key값을 가지고 있어야지 spring cloud config로 부터 설정 값들을 받을 수 있다.
해당 설정이 없다면 아래와 같은 exception이 발생한다.
'Spring > spring-cloud' 카테고리의 다른 글
| [Spring] Spring Cloud Netflix Eureka 사용해보기 (0) | 2022.04.15 |
|---|---|
| [Spring] Spring Cloud Gateway(SCG) 사용해보기 (0) | 2022.04.12 |
| [Spring] ActiveMQ - Spring 사용해보기 (0) | 2022.04.10 |
| [Spring] Spring Cloud Config-Asymmetric Key Encryption(비대칭키 암호화) (0) | 2022.01.05 |
| [Spring] Exception 처리(@ControllerAdvice, @ExceptionHandler, @RestControllerAdvice) (0) | 2021.12.29 |